On this page
ZEN panel
ZEN panel allows you to manage incoming and outgoing payments that your shoppers made via ZEN.
Managing payments
You can accept and manage payments made with ZEN Checkout once your ZEN account has been activated.
To view all incoming payments, log in to your ZEN panel. Then, select the Payments section from the menu.
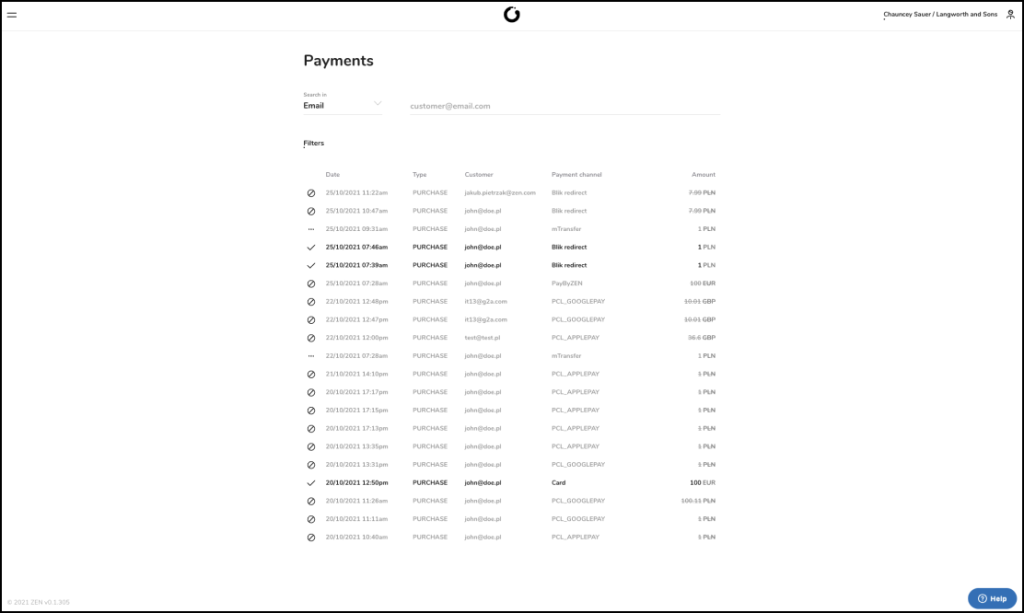
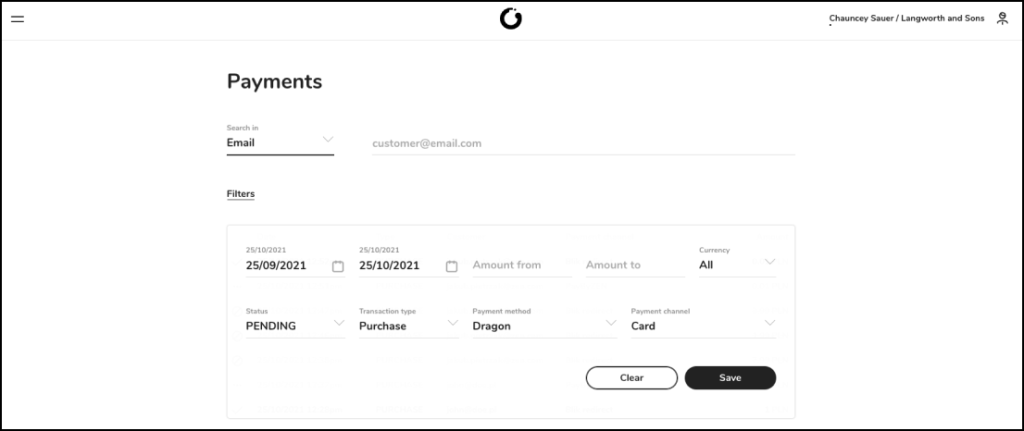
The Payments section also allows you to view the details of each transaction, filter them to narrow the results, and search the list by preferred keywords.
You can click on each transaction to see its essential details.
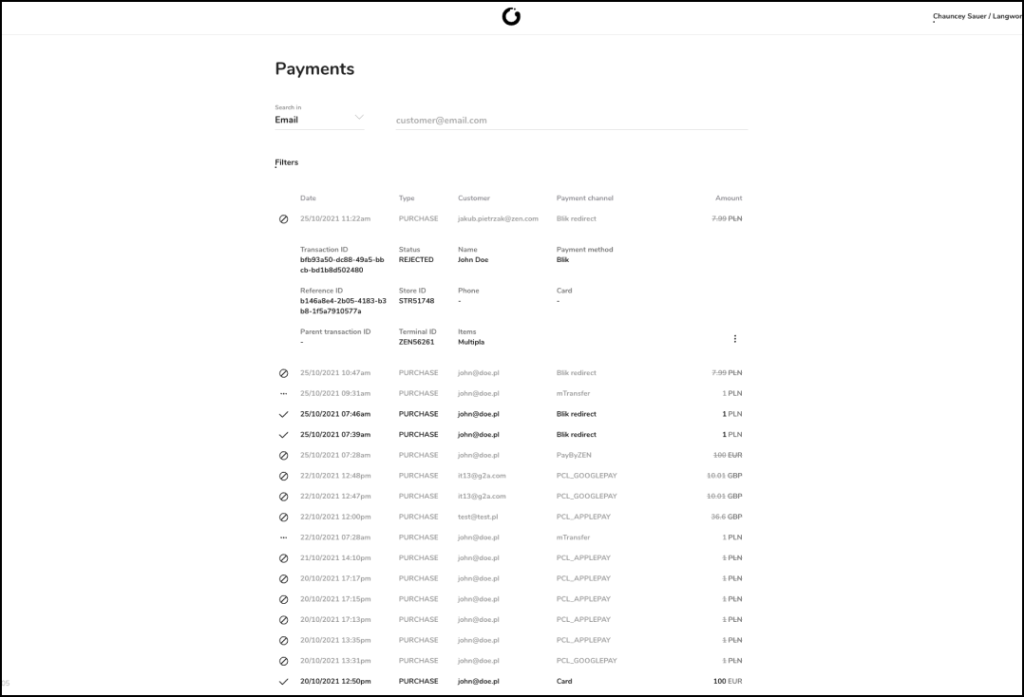
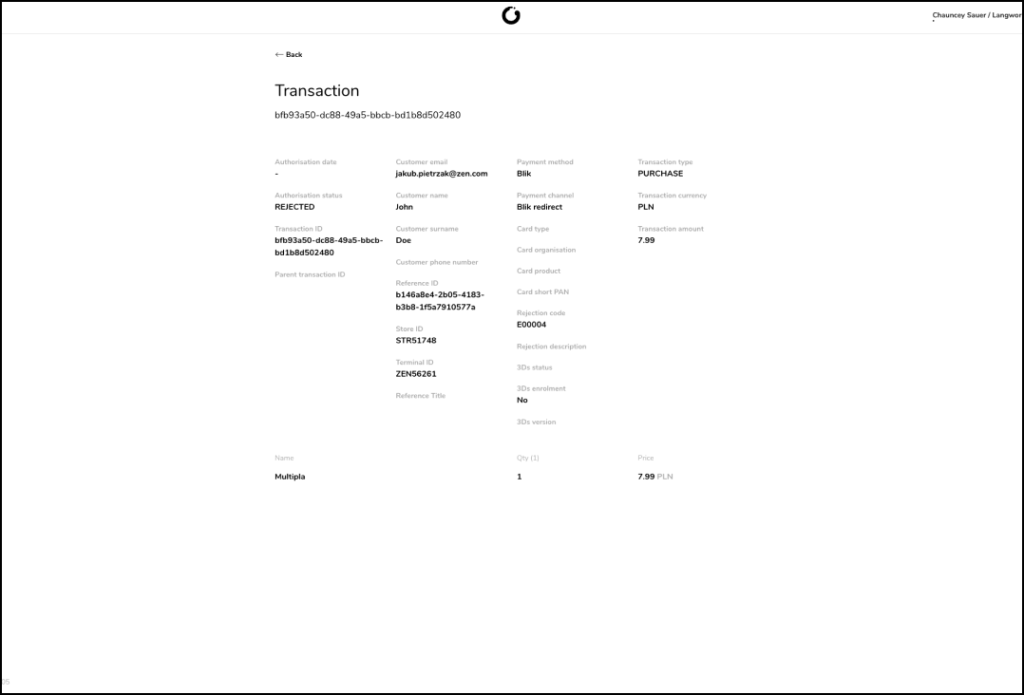
To get detailed information on the transaction, hover over the selected transaction and click on the arrow that should appear next to it. The details will then open in a new window.
Managing refunds
Transactions processed via ZEN can be partially or fully refunded to the payer.
Refunds can be processed in two ways:
Merchant panel
- Log in to your ZEN panel, open the menu and select the Payments section.
- Locate the transaction which you would like to refund and display its details.
- Click on the Refund button, and specify the amount to be refunded.
The refunded amount cannot be lower than the min. transaction value (link do Payment methods), nor greater than the amount of refunded transaction.
API
- Prepare the POST /transactions/refund according to documentation.
- The refunded amount cannot be lower than the min. transaction value, nor greater than the amount of refunded transaction. Learn more about payment methods.
transactionId – id of the transaction to be refunded provided by ZEN
merchantTransactionId – id of the refund transaction from your system. It must be unique (no 2 transactions, no matter the type, can have same merchantTransactionId)
Managing logo
You can add, remove and manage your store logos directly via ZEN’s panel.
1. To manage your store logos, log in to your ZEN panel.
2. Then, go to stores section in left sided menu.
3. From dropdown list chose desired shop you would like to upload new logo.

4. Click store settings icon and go to settings tab. Store logo selection will appear.

5. Prepare your logo using below guidelines.
- max logo dimensions: 120x120px
- file type: *png, *jpeg, *svg
- max logo size: 300KB
Click upload button and chose your logo from the device, or simply drag & drop your logo to logo image section.
![]() Notice: Please make sure you have all necessary rights for uploaded logo.
Notice: Please make sure you have all necessary rights for uploaded logo.
6. You can also remove uploaded logo by using remove button and add another one if needed.
7. The added logo will appear on top-right corner on ZEN’s checkout page.

Quick guide ready to download